The Justified Gallery module from DiviGrid offers multiple placement options, including as a lightbox on a specific website, on a page featuring a single image, via a media file, or as a clickable image leading to a custom URL. The module's design ensures that images in a justified gallery are resized to fit seamlessly into the available space, creating a sleek and tidy appearance that can be utilized on a diverse range of websites to showcase their work in a polished and sophisticated manner.
Gallery Settings:
How Row Height Works: Row Height refers to the height of the row of images displayed in the gallery. The row height is determined by the height of the tallest image in the row, and all the other images in that row are vertically centered within that space. This creates a visually pleasing and balanced layout for the gallery, where images of varying heights are displayed in a way that looks harmonious.
Last Row Settings: Sometimes very few images come to the last row that may not look good. Set this setting to manage last-row images. Justify option will cover the entire row.
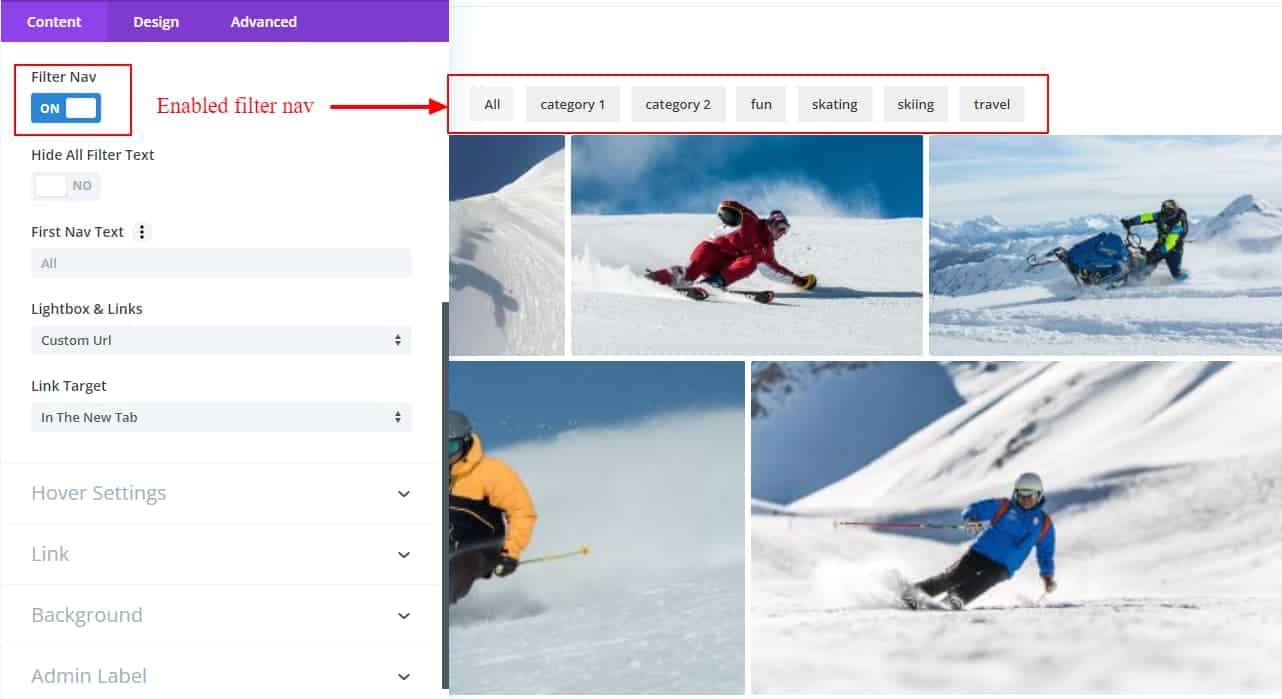
How The Filter Nav Switch Works:
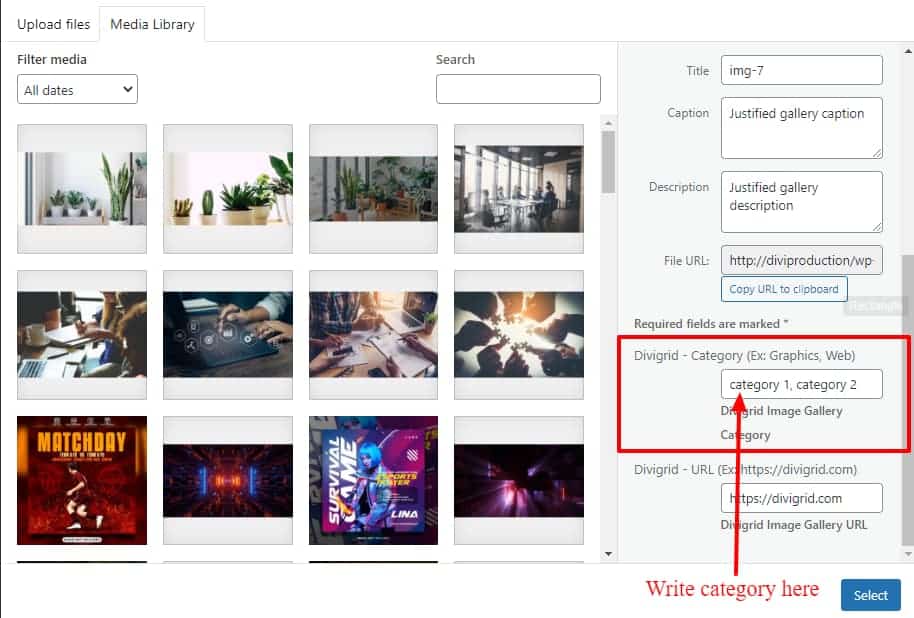
In the WordPress media library, you can assign categories to images. Categories show up as a navigation bar above images. You can turn off the navigation bar by flipping a switch.
Lightbox: If you select "Lightbox" the image will pop up. The background color of the lightbox can be changed.
Media File: Once the media file is selected, the image will open at its own URL।
Attachment Page: If the Attachment Page is selected, the image will open in a singular type page with its caption and description details. If desired, this page can also be designed differently.
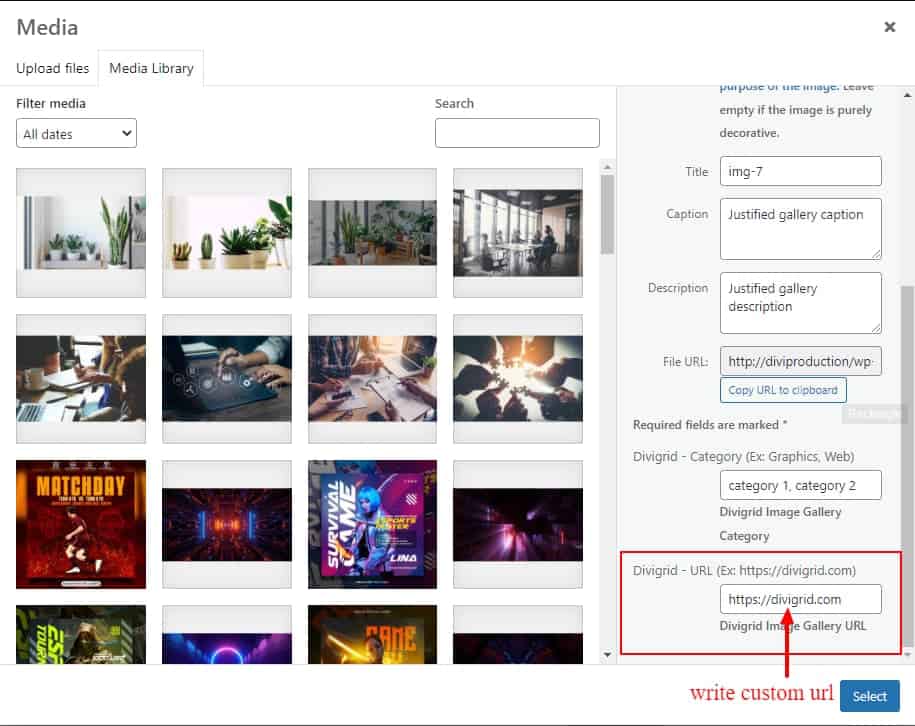
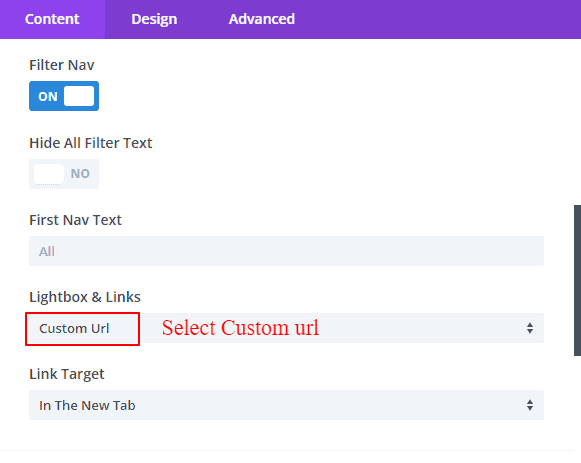
Custom URL: If you want to take the user to a website by clicking on the image, then you have to write that specific URL from the custom URL field of the media library while uploading the image.
where do I write the custom URL?
To write a custom URL, enter the specified URL in the Media Library DivGrid Custom URL field.
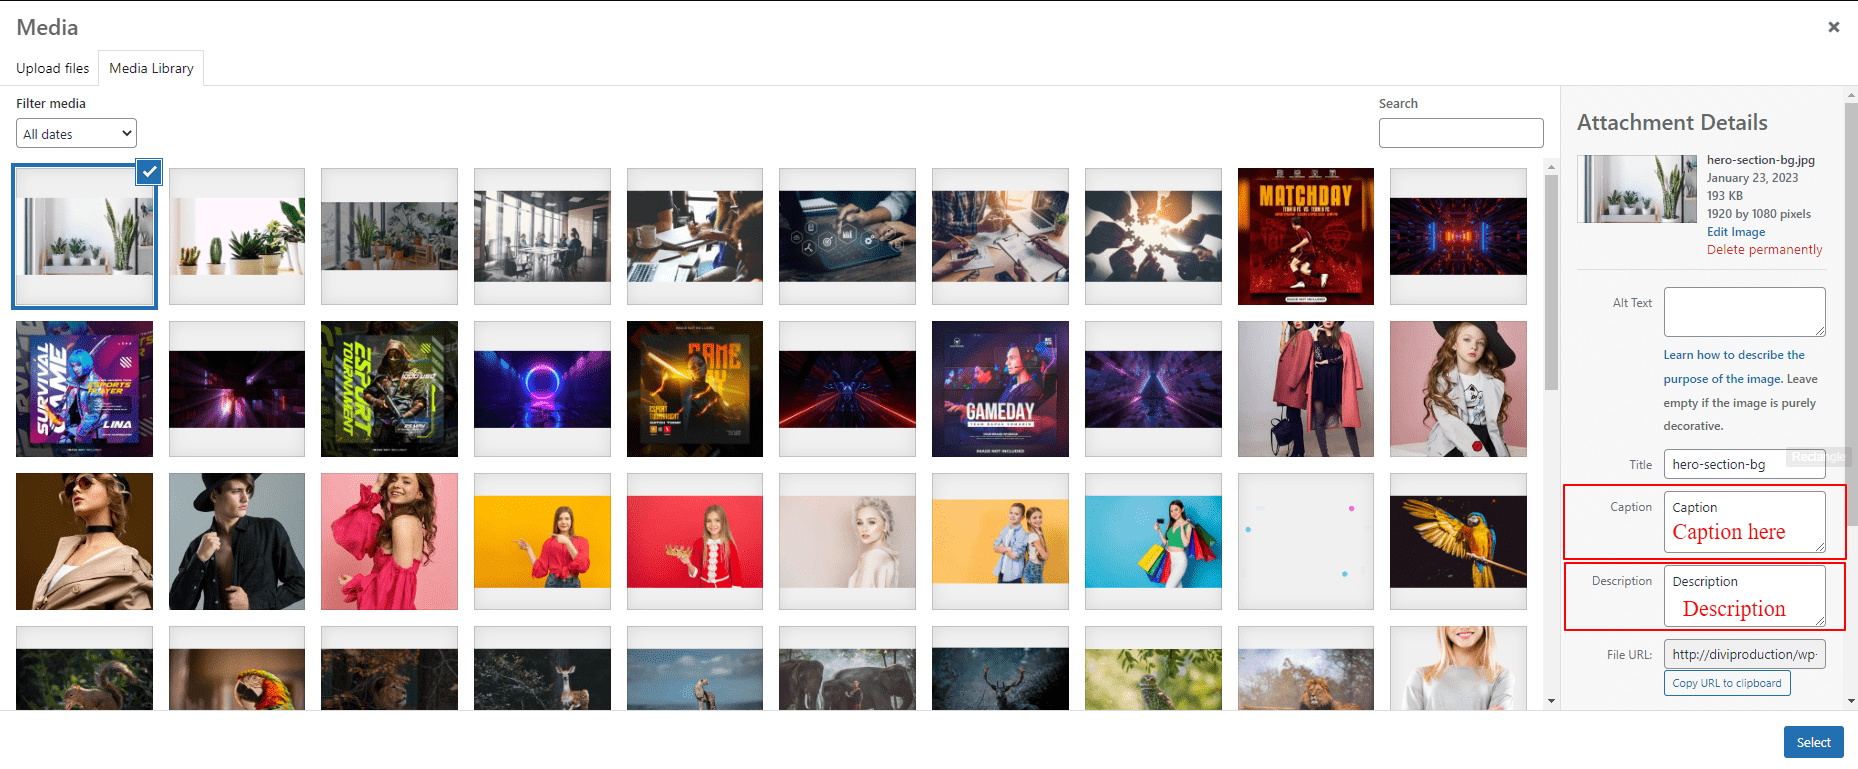
How to add the caption and the description?
When you upload an image to the media library or choose to upload a new file, you'll see a field next to each image where you can add a caption and description. Simply type in your desired caption and description for each image in those fields. If you choose not to provide any caption or description, they won't be displayed for that particular image in the gallery. So, it's completely up to you whether you want to include captions and descriptions for your images in the justified gallery.
How to show the Caption on the image?
To display captions, toggle the "Show caption on hover" switch to the on position. Additionally, there is another switch located below this option that allows you to display captions at all times. Enabling this switch will ensure that captions are always visible. To add a title or caption, enter the desired text in the caption field when uploading an image from the media library. Do not show the Always Show Caption switch if the Show Caption on Hover switch is not turned on.
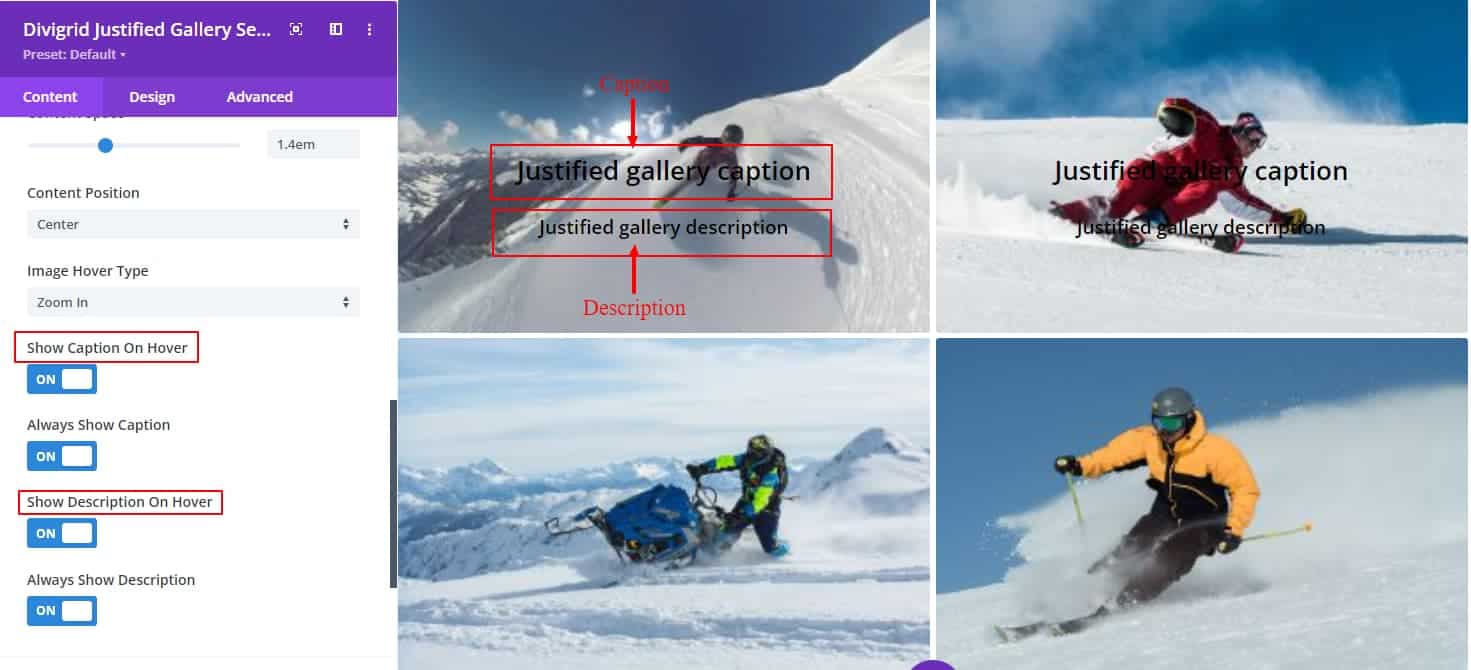
How to show the Description on the image?
To display the description, the same steps have to be done, which was done during the caption text.