Transform your website's design with our comprehensive Header Layout Pack for Divi. Crafted with precision and creativity, this pack offers a variety of stunning header designs that are not only visually appealing but also highly functional. Whether you're aiming for a minimalist look or a more elaborate layout, our header pack has something to suit every style and purpose. Perfect for web designers, developers, and anyone looking to make a bold statement with their website's header, this pack is your go-to solution for creating a lasting first impression.
01. Divigrid Header Layout Pack
Step 1: Download the Divigrid Header Layout Pack from Divigrid.
Step 2: Extract the Files After downloading, you will find a .zip file named Divigrid Headers json File.zip. Extract this zip file to access the contents.
Step 3: After Downloading you will find two subfolder called Divigrid Headers separate json File and One Click Import json File.
Divigrid Headers separate json File
Explore the Folder Inside the extracted folder, you will find 6 subfolders, each representing a different category. Each subfolder contains individual header layouts, allowing you to upload and use a specific header without needing to import the entire pack.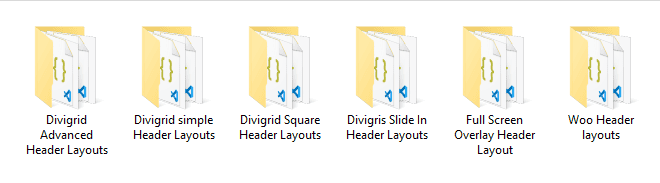
One Click Import JSON File
02. Importing the Headers into the Divi Library
Step 1: Open the Divi Library
Navigate to your WordPress dashboard, and go to Divi > Divi Library.
Step 2: Import the JSON File
Click on the "Import & Export" button at the top of the page. In the import tab, click "Choose File" and select the extracted JSON file from the Divigrid Header Layout Pack. Then click "Import Divi Builder Layouts".
Step 3: Use Your New Headers
Once the import is complete, you'll see the new header in your Divi Library. You can now add this header to your pages by selecting this from the library when building or editing a page.
03. Importing a Header in Your Theme Builder
Step 1: Open the Theme Builder
In your WordPress dashboard, navigate to Divi > Theme Builder.
Step 2: Import the Header
Within the new template, click on "Add Global Header" and then select "Add From Library". Choose the header layout you previously imported into your Divi Library.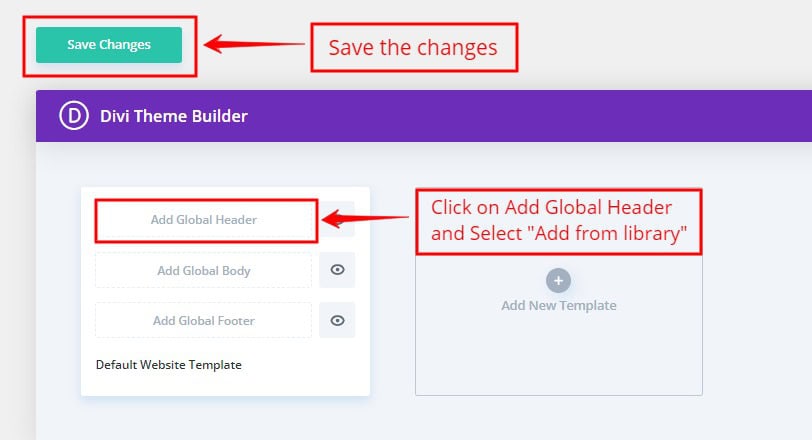
Step 4: Save Your Changes
After selecting the desired header, click "Save" to apply the changes. Make sure to save the Theme Builder settings to ensure the header is active on your site.
Your new header is now live and integrated into your theme, enhancing your website's design and functionality.
04. Customizing the Header: Changing the Logo
Step 1: Identify the Header Type
The method to change the logo depends on the specific header layout you are using.
Step 2: Change the Logo in the Menu Module
For headers that use the Menu Module:
- Open the Divi Builder and navigate to the header section.
- Click on the Menu Module to edit it.
- Go to the "Logo" tab within the module settings.
- Upload your own logo by selecting a new image from your media library or uploading a new file.
Step 3: Change the Logo in the Image Module
For headers that use an Image Module:
- Open the Divi Builder and navigate to the header section.
- Locate the Image Module used for the logo.
- Click on the Image Module to edit it.
- Upload your own logo by selecting a new image from your media library or uploading a new file.
Step 4: Save Your Changes
After making the necessary changes, click "Save" to apply the new logo to your header. Make sure to save and update your page or template to ensure the changes are live on your website.
05. Customizing the Header: Changing Colors
Most of the header colors can be customized directly within the modules, rows, and sections. However, some colors are set in the Code Module. Here’s how to change them:
Step 1: Change Colors in Modules, Rows, and Sections
- Open the Divi Builder and navigate to the header section.
- Select the module, row, or section you want to customize.
- In the settings, go to the "Design" tab where you can change colors for backgrounds, text, borders, etc.
Step 2: Change Colors in the Code Module
- Switch to the Wireframe View in the Divi Builder to easily locate the Code Module.
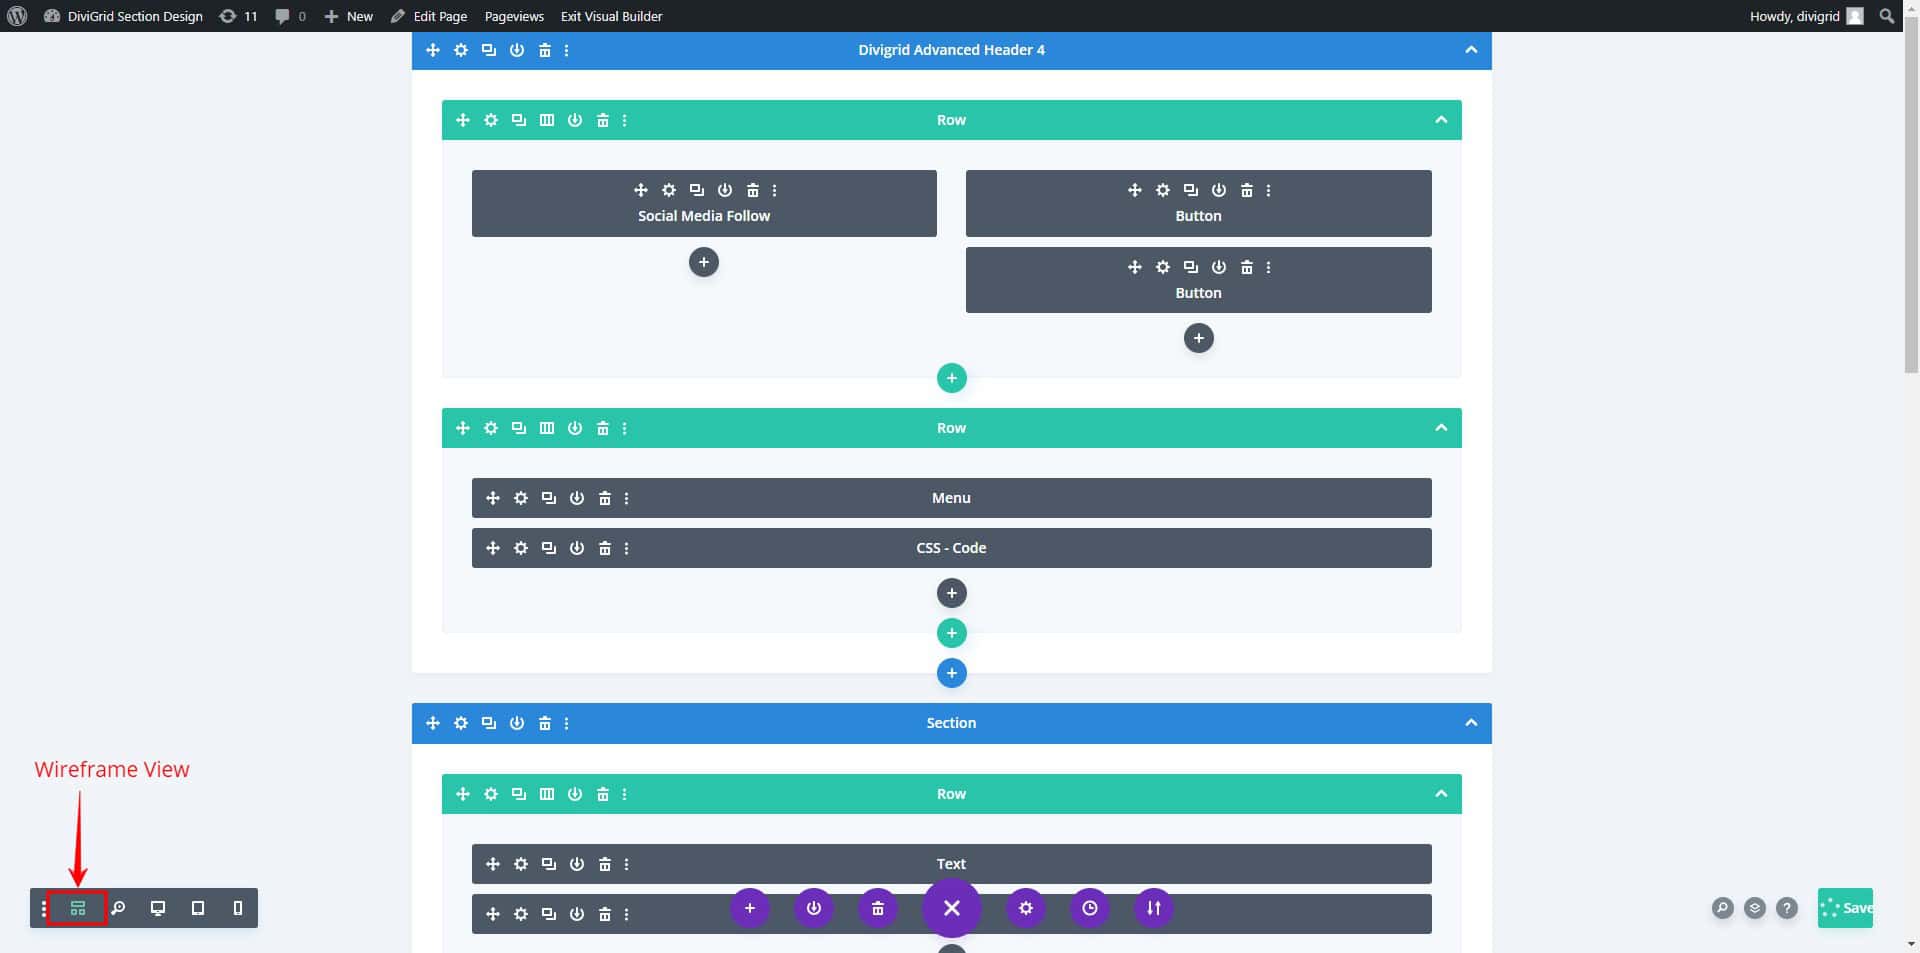
- Open the Code Module, where you will find CSS code that affects the header’s colors.
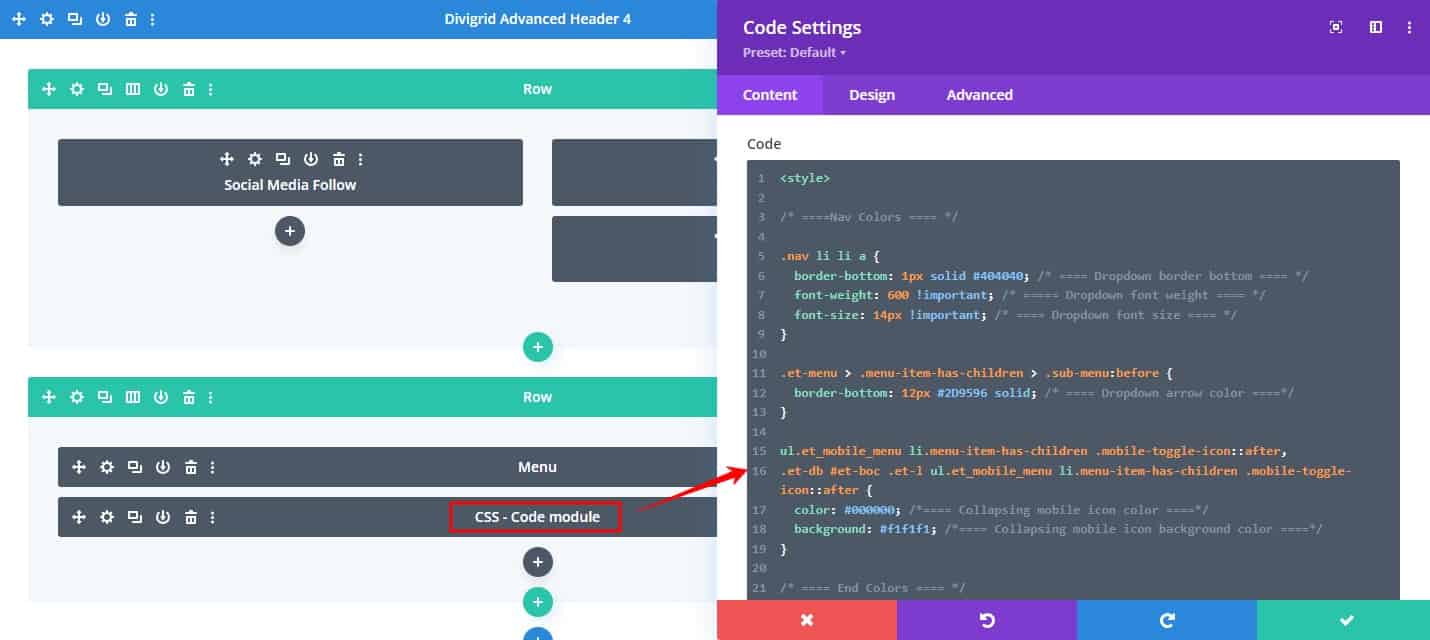
Step 3: Locate and Edit the Color Codes
The relevant CSS for color customization is found between the comment lines /* Colors / and / End Colors */. Here is an example of what the CSS might look like:
Step 4: Modify the CSS Colors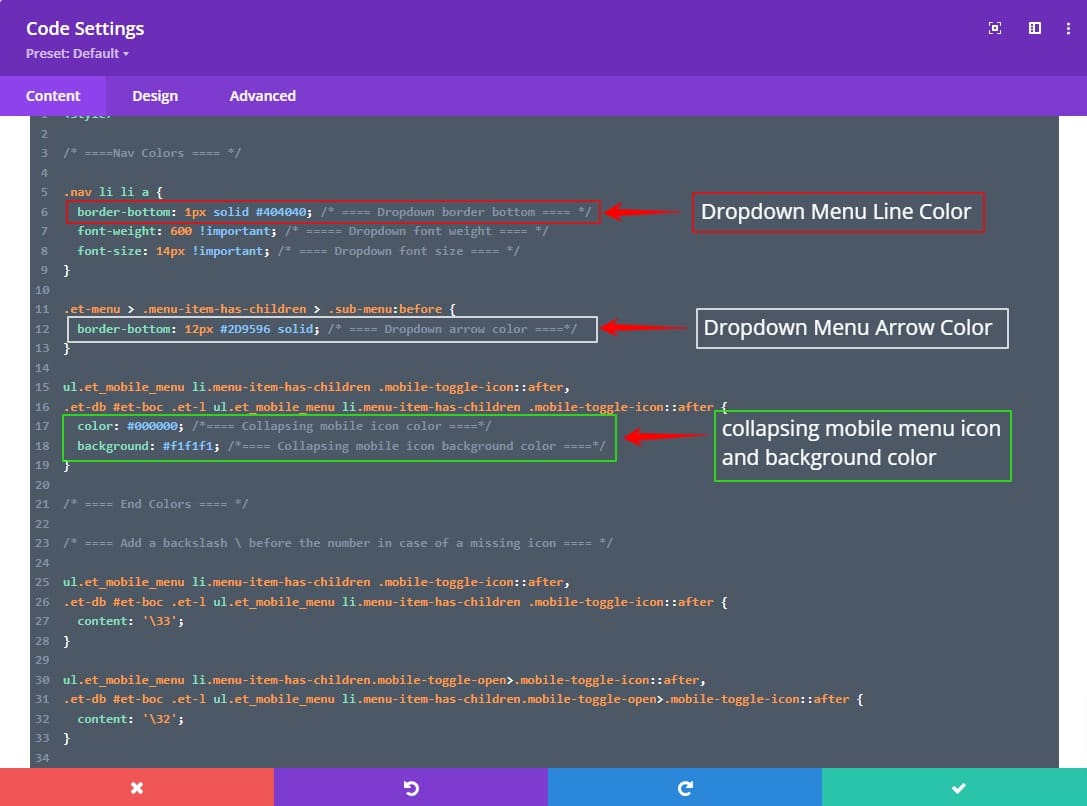
-
Red Mark Area: Change the border-bottom to your desired dropdown menu line color.
-
White Mark Area: Change the border-bottom to your desired dropdown menu arrow color.
- Green Mark Area: Change the collapsing mobile menu icon and background color.
Step 5: Save and Apply Changes
After making the necessary changes, click "Save" to apply the new colors. Ensure that the updates are saved and your page or template is updated.
By following these steps, you can effectively customize the colors of your header to match your website’s design and branding.